![]()
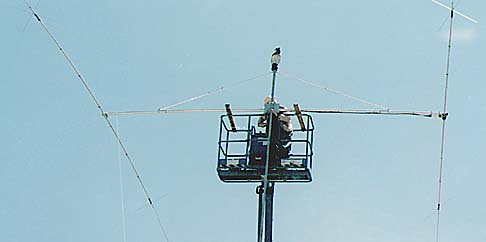
First, the
Cushcraft 40-2CD 2-element 40 meter yagi gets bolted into
position at the top of the mast. The driven element is on
the right, reflector on the left and the entire antenna has
been strengthened per Dave Leeson W6NL's
articles. Note the two 2x4
"forks" that have been secured to the top of the boomlift
bucket. This allows the antenna booms to be brought flush
against the mast while still affording the bucket some
maneuvering room. Bob KI7GN.
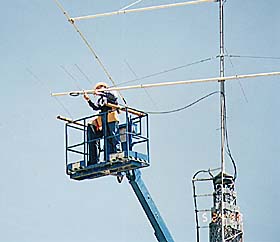
Next, the
M2 6M7
7-element 6 meter yagi is placed into position 6 feet (1.8
m.) below the 40-2CD. What looks like a large element on the
left end of the boom is actually the 40 meter reflector
above it. Chuck NX6W and Bob KI7GN.

Dick K7VC applies
the finishing touch to the N connector attaching the 6M7
transmission line. Because the
6M7 coax is one continuous
run of Davis RF BURY-FLEX and was installed before the
antennas, it has to be trimmed, connected and waterproofed
after the antenna is in place.
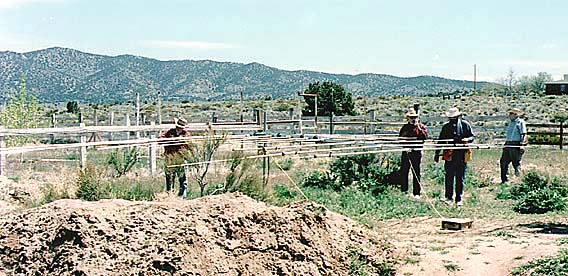
The
Hy-Gain TH11DX
11-element 10-12-15-17-20 meter yagi is the largest antenna
to be installed. Here it is being removed from its temporary
mast and prepared to be moved into position for the lift.
Chuck NX6W, Dick KJ7UK, Dick K7VC and Duncan
WA6RRU.
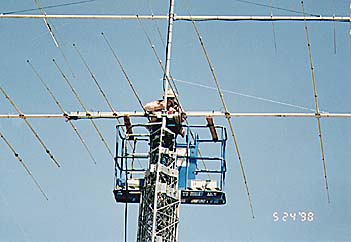
Finally, Bob KI7GN
secures the
TH11DX in place, a foot (0.3 m.) above the top
of the tower and 6 feet (1.8 m.) below the 6M7.
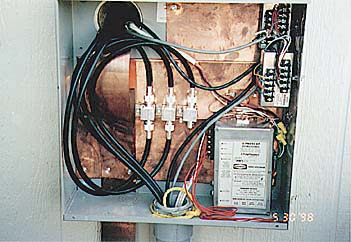
Last, but by no
means least, all connections to and from the tower pass
through this single-point ground window populated with
Polyphaser lightning/surge protectors. Note the 3-inch (7.6
cm) wide copper strap running down to the ground field and
up into the shack.
Go to Results
Page.
Go back to Preparation
Page.
Go back to Antennas
Page.
Go back to Home
Page.
Copyright © 1998-2010 Dick Flanagan K7VC. All rights reserved. Updated December 5, 2010